Showing posts with label desserts. Show all posts

Saturday, 22 October 2016

Pandan Madeleines


I have been searching for a recipe for a new flavours. The French loves the Pandan Chiffon that I occasionally baked for them & one of them suggested pandan flavour madeleines might be a perfect flavour.

Finally attempted & I hope that they will like the new flavour ;) 

This is my first attempt in making these with referenced to Eddie Tan's recipe & video : http://youtu.be/E8lvONi6DLw

Adapted recipe for Pandan Madeleine: 
Ingredients
3 eggs 
120g sugar 
120g self raising flour
1/4 salt 
50g melted butter 
1 tsp Pandan extract
40g coconut milk

Preparation steps:
1. Whisk eggs & sugar until pale. 
2. Add salt , pandan extract , melted butter & coconut milk. Continue to whisk until evenly mixed.
3. Add the self raising then whisk until evenly mixed.
4. Transfer to a container & fridge for at least 1 hr for the hump. 
5. Scoop into the Madeleine's mould & bake at 180deg C for 8 mins or until golden brown. 

Bon appétit ! 

Chin's notes: 
1. Will try with added coconut flakes & use coconut cream instead of coconut milk in the next bake. 
2. I just had one , & I'm going to have another. :P

Thursday, 7 January 2016

Thab-Tim-Krob ( Red Rubies )


A popular Thai dessert, it has become a favourite during gatherings ;) 

Recipe from At Home with Amy Beh 2

Thab-Tim-Krob Recipe 

Ingredients 
300 g water chesnuts, skinned & diced. 
Red food colouring 
1 cup of tapioca flour 
2 tbsp corn flour 
Iced cold water

500ml coconut milk 
2 pandan leaves, knotted 
1/2 salt 

Sugar Syrup: 
300g of sugar 
200ml of water 
2 pandan leaves, knotted 

Preparation steps 
1.  Prepare the sugar syrup, in a pot add the sugar, water & pandan leaves. Bring to boil / until all the sugar dissolves. Strain & set aside to cool.
2. Prepare the coconut milk, in a pot add the coconut milk & pandan leaves. Heat it until just hot, do not bring to boil. Strain & add 1/2 sugar syrup,  set aside to cool. Put in the fridge until ready to serve. 
3.1. Prepare the red rubies, add the food coloring to the diced water chestnuts. Add enough colouring until you get a nice deep red. 
3.2. Add the tapioca flour & corn flour into a container / large zipped lock bag. Make sure that the container is large enough for the water chestnuts. Shake the 2 different flours to mix them well. 
3.3.  Add the chesnuts into the flour mixture & give it a few good shake until all the diced chestnuts are evenly coated with flour mixture. Shake off the excess flour with a colander. Too much flour will make the water chestnuts gooey. 
3.4. Meanwhile, boil a large pot of water. Bring to boil then add coated water chestnuts & let it boil for 2 - 3 minutes until all the flour turned transparent / "rubies" float to the surface.  Try to separate the "rubies" if they stuck together. During the boiling process. 
3.5. Drained & immediately chilled in iced cold water. Drained & add 1/2 the sugar syrup. Leave in the fridge until ready to serve. 

To serve: 
Add the "rubies" in a bowl & coconut milk in a bowl. Served with crushed iced / ice cubes. 

Chin's notes: 
1. Jackfruit / sago can be added. 
2. You can add your desired food colouring of your choice.
3. I used canned coconut milk. Frozen water chestnuts. Thaw them out before adding food colouring. 


Monday, 16 November 2015

Italian Meringue Macarons


My kids loved macarons, I don't mind eating them, BUT I'm reluctant to make them because they takes a while to prepare. 


I had tried many times & this batch is the most successful batch that I'd achieved.

I'm glad that my friend, Cindy shared her lovely recipe with me.

Ingredients for almond mixture:
125g ground almonds
125g icing sugar
46g egg whites
food colouring

Ingredients for Italian Meringue:
125g sugar
31g water
46g egg whites

Preparation Steps for macaron shells:

1) Blend ground almonds & powdered sugar in food processor until fine and sift into a bowl. Add egg whites & food colouring to mix into a paste.
2) Start whisking the egg whites in the mixer and mix until until frosty. Meanwhile, bring sugar and water to boil until it reached 118 degree C. Start whisking the egg white and pour the hot sugar syrup slowly ( from the side ) into the egg white and continue to whisk until it is stiff peak & shiny.
3) Carefully fold the meringue into the egg white paste a little at a time gently. Fold the mixture until it flows down smoothly and form ribbons and transfer into a piping bag.
4) Pipe the mixture onto parchment paper or silicone mat. Tap the baking tray lightly to remove air bubble. Let it rest for half to one hour depending on temperature in different countries. Once it forms a "skin" on top of the shell, it is ready to bake in pre-heated oven of 150 degree celsius for 12-14 minutes. Let cool before removing from baking tray.

Ingredients for buttercream fillings:

1/2 cup salted butter soften
2 cups icing sugar
1/8 tsp of vanilla extract

Preparation Steps:
1) Beat the butter follow by sugar & vanilla essence. Add preferred flavouring into the mixture.
2) Put in a piping bag and store in fridge until it is ready to be piped onto the macarons.

Voilà! 

Chin's notes: 
1. Heat control & the waiting time for the "skin" to develop is important. My 2nd bacth right after the first was not successful because I did not wait for the "skin" to develop. 


Tuesday, 22 September 2015

Mooncakes Round 5 - 2015

Shanghai mooncakes, been wanting to try this recipe since last year.  I have some salted duck eggs in the fridge and a day without any activity.  Finally I managed to bake these and get it out from my to-do-list. :)

Shanghai Mooncakes with walnuts. Bon appétit!

The original recipe : 

I replaced the custard powder with cornflour. The pastry turns out flaky & not too bad. 
Used ready made paste, white lotus purchased from Kwong Cheong Thye, Singapore. 

Rub the butter into all the dried ingredients & added the wet ingredients to form a soft dough.
Separated the yolk from the white. Cleaned.  Coated with shoaxing cooking wine. Baked at 160 degree C for  15 mins or until cooked.  Cut each yolk into 4.
White lotus paste (about 28 grams) with melon seeds and wrapped a piece of yolk in the middle. Roll into a ball.

Chin's notes:
1. I used 24 - 28 grams of paste and 26 grams of dough, made about 28 pieces of golf ball size Shanghai mooncakes.
2. Make sure the duck yolks are fully cooked. May required more than 15 minutes. I covered with an aluminium foil to prevent drying out.  Steaming is an alternative to cook the yolk.
3. Did not use the machine as suggested by the recipe, used rub the butter into flour method.


Sunday, 13 September 2015

Mooncakes Round 3 - 2015

Tried making snow skin mooncakes (冰皮月饼) using recipe from Rasa Malaysia blog. It was easy & the texture was good.

Ready Red bean & green tea pastes purchased from Kwong Cheong Thye ( Singapore). 

Lychee with red bean

Lychee with red bean paste snowskin mooncakes: 

65g Cooked glutinous rice flour (gao fen).
70g icing sugar 
65ml lychee syrup from canned lychee
1 tbsp fresh milk
1 tbsp shortening 
Food colouring of choice (optional)
Red bean paste

Preparation steps: 
1. In a big bowl sift the cooked glutinous rice flour & icing sugar together. 
2. Rub shortening into the mixture until it resembles crumbs. 
3. Add the syrup, milk & colouring.
4. Form a dough and give a few good knead until texture is soft. (if too sticky add a bit of gao fen). Set aside for 10mins.
5. Weigh the red bean paste & shape into a ball. My red bean is 30g & dough is 26g. 
6. Flatten the dough & place the paste & seal it completely. Roll onto the gao fen & dust off the excess flour then shape it using the mooncake's mould. 
7. Keep in the airtight container in the fridge for at least 1hr before serving. Serve cold with tea!

Voilà! 

Mini snow skin mooncakes

Chin's notes: 
1. Original recipe from Rasa Malaysia Blog : http://rasamalaysia.com/snow-skin-mooncake/2/
2. Will add some lychee flavour in the future, because I can't taste the lychee. 
3. Reduced the sugar because lychee syrup is sweet. 
4.I halved the ingredients, made about 12 mini mooncakes. 
5. With green tea paste
Second batch - Green tea paste

Monday, 4 May 2015

Pandan Kaya Cake

I have a mission to make this cake for a special celebration in Paris.  I have never baked this cake before & I'm determine to give it try with the following recipe from Kitchen Tigress. 


My first attempt & I made some minor adjustment to the recipe because I do not have some of the ingredients & they turned out great! At least they taste yummy to the family ( my tasters ;) !! & the sweetness is just right! :p

This is a cake with a layer of "jelly" / custard garnishing with coconut flavour.

Pandan Kaya Cake adapted from Kitchen Tigress

For the cake recipe : 
Ingredients - 
4 egg whites ( from medium size eggs) 
40g sugar 
1/2 tsp cream of tartar 
B
10g sugar 
3 egg yolks ( from medium size eggs ) 
50g corn oil / vegetable oil
45g coconut milk
1/2 tsp baking powder 
50g plain flour - sifted 
1 tbsp pandan extract

Preparation steps:
1. Line the baking tray with baking paper. 
2. Put all the A ingredients into the mixing bowl & whisk until the egg whites stif peak. 
3. In a separate bowl, mix all the B ingredients until they are well combined. 
4. Gently fold A into B in 3 portions until they are well combined. Do not over fold.
5. Transfer mixture into a lined baking tray & bake in a preheated oven at 160 degree C for 40 minutes or until the cake is cooked. Test with toothpick, they should come out clean when cake is cooked. Meanwhile, prepare the kaya / jam while waiting for the cake. 
6. When the cake is ready, remove from oven & leave the cake to cool on a cooling rack. 

For the kaya ( jam ) recipe
Ingredients -
C
340g of water + 1 tsp pandan extract
1/2 tsp of white agar agar powder
40g sugar 
25g of butter (I used salted butter) 
A pinch of salt (very little to bring the flavour out)
D
120g coconut milk
35g corn flour 
1/2 tsp pandan extract 
Few drops of yellow colouring ( or more to get the desire green colour) 

Kaya / Jam 

Preparation steps : 
1. While the cake is in the oven baking. Mix all the C ingredients into a cooking pot (thick/heavy base pot is preferred). Stir until all the sugar dissolved. Set aside for 30 mins / more. 
2. In a separate bowl, mix all the D ingredients until they are well combined. 
3. Only start to cook the kaya / jam only when the cake is competely cooled! 
4. Heat up the pot with C mixture on a medium heat. Do not bring to boil. Just warm enough to melt the butter.  Once the butter has melted. Turn off the heat & remove from heat. 
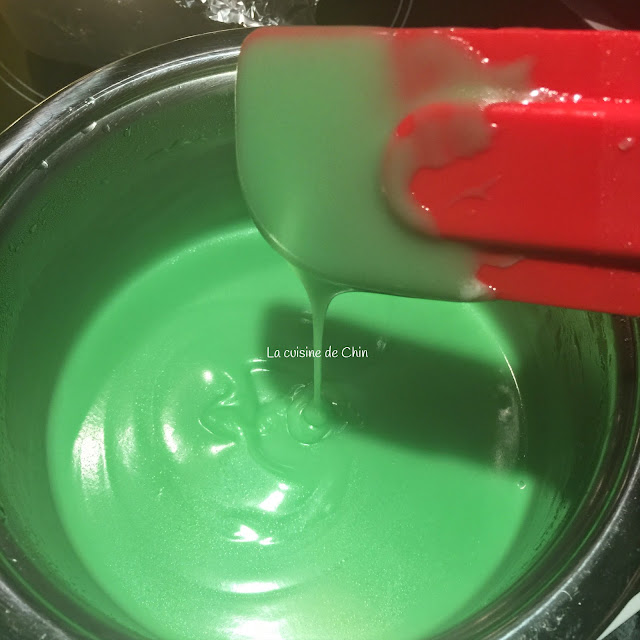
5. Stir in D mixture into C, once is well combined, turn on the heat to low - medium heat & cook the mixture until it is smooth & thicken. Stir constantly. Add more drops of yellow colouring if the mixture is too green. Add yellow colouring until the desire colour is achieved. 
6. Once mixture is thicken (when they coat the side of the pot). Turn off the heat & set aside to cool down a little. Just a few minutes.

To assemble the cake: 
Cake assemble process
1. You'll need a container / pan to put  the cake & kaya together. I lined the container/pan with aluminum foil. 
2. Cut the cake into the desire shape. I just halved my square cake to get 2 rectangle cakes. 
3. Place the bottom layer cake in the prepared container / pan. Then pour the kaya over the cake. Slowly swirl to get a layer of kaya coated evenly on the cake. 
4. Then wait for the kaya to set a little. I put into the fridge for 1 min to let the kaya set. 
5. Place the other half of the cake on the kaya. With the top facing the kaya, so I will get an even top for the finished cake. Then pour the kaya over the cake, swirl to get a smooth & even top.
6. Leave it in the fridge until the kaya is completely set. I left it overnight in the fridge. 
7. When the kaya is set, unmould & trim off the edges. Cut the cake into serving bite sizes & serve them cold. 

Trim off the sides

Voilà & bon appétit! 

Chin's notes
1. Here is the link to the original recipe: 
http://kitchentigress.blogspot.sg/2014/06/pandan-kaya-cake-video-recipe.html?m=1
2. The ingredients were quite small, I'll double them in my next bake! Only managed to get 2 layers of cake instead of 3. My final cake is about 5.5"x8.5" cake.
3. Take note of the sequence in the preparation. 
4. Kaya consistency can be tricky. I cooked until I can see the obvious stirring trails when I stir the mixture. 

Sunday, 26 April 2015

Strawberry & Orange Sorbet


Yummy sorbet recipe shared by my friend Esther Tho, they are really yummy! Thank you!

2 cups of strawberries - I used 280g 
1 orange,  juiced - I used 100ml 
Sugar to taste


Blend all the ingredients in a blender. Seive out the strawberries seeds then transfer to a freezing container.  Leave in the freezer for a few hours until mixture completely frozen, scope to serving glass / bowl & serve cold. 

Bon appétit ! 

Chin's notes: 
1. I will add more strawberries in future. ;) 

Sunday, 14 December 2014

Music to your mouth - Chocolate mousse

This is a recipe that I learnt to make during my stay in Paris from one of the cooking demo classes that I attended. My first attempt, the texture did not turned out right & it was too watery, but they still taste very yummy after I fridged them for a few hours.


This time (2nd attempt) they turned out better as I was able to pipe them into those mini cups & I added some decoration to make them special for my son's mini recital & gathering at his music teacher's house today.

Video tutorial added on 7 Feb 2015z 

Chocolate Mousse 
Serves 25 - 30 (very mini cups) 

Ingredients : 
1/2 cup Water 
125g sugar 
250g dark chocolate (70%) cut into pieces 
2 1/2 cup / 600ml Cream (at least 40% fat) 
4 egg yolks
2 eggs 
Decoration (optional) 

Preparation method : 
1. Whisk the cream until it reaches soft peak. I used the electric mixer & whisk for 5 - 8 minutes on high & set aside. 
2. In a small pot, add sugar & water. Bring it to boil to reduce the water in medium heat. It will turn shinny & thicken. 
3. While you are preparing the sugar syrup, melt the chocolate in a bowl sitting on a pot water. Low heat on the stove until all the chocolate melted. 
4. In another mixing bowl, add in all the eggs & yolks whisk until light & fluffy on medium speed. Slowly pour your hot sugar syrup into the egg mixture when the syrup is ready. Sugar syrup should be around 110 degree C. 
5. Fold the egg mixture into the melted chocolate until well combined. Then fold in the whipped cream ( in 2 parts ) until well combined. 
6. Transfer into a piping bag & pipe into the serving cups / bowls. Decorate the mousses & fridge them for an hour / until serving. 

Bon appétit !!

Chin's notes: 
1. At least 70% cocoa in dark chocolate is preferred & full cream which can be whipped. I used these. 

2. The hot sugar syrup is very HOT!!! DO BE VERY CAREFUL !! 
3. Use cream that you can whipped to soft peak.
4. I made melted chocolate decorations to "dressed" the mousses. - to make these just melt the dessert chocolate / chocolate of choice ( like step 3 above), transfer into piping bag & pipe on to baking paper & freeze for a few minutes in the freezer. You can also put any design under the baking paper & trace the design. I made them a few days ahead. 


Ta-da... Ready to be served!!! 

l


Sunday, 30 November 2014

Cheese Tarts with Flower Prints

Mini Cheese Tarts with prints.  My first attempt which turned out quite well and yummy.  They were all gone before I get a chance to try one. The feedback from my "tasters", all said yummy.   


A recipe which I adapted from http://www.azlitamasammanis.com, and followed the ingredients measurements closely.

Here is my version of making these tarts:

Part1 - Making tart shells tutorial :- http://youtu.be/EhVgyNr_IXY

Part 2 - Making Mini Cheese Tarts :- http://youtu.be/SHm7PEBZT1A

Mini Cheese Tarts Recipe :

Tart Shells

Ingredients :
170g butter cut into cubes
50g icing sugar
290g All purpose flour, sifted
1 small egg
1 tsp vanilla extract or essence
tart moulds

Preparation methods :
1. Put flour and icing sugar in the mixing bowl.  Add in the butter.
2. Rub the butter into the flour mixture until it resembles crumbs texture.
3. Add in the vanilla and egg into the mixture, and form a dough ball. Do not knead.
4. Wrap/bag the dough and leave in the fridge for 30mins.
5. Measure each dough for making the tart shell, about 14g or lesser.
6. Shape the tart shell onto the tart mould.  Refer to video tutorial, http://youtu.be/EhVgyNr_IXY
7. Prick holes with fork / toothpick on the dough.
8. Bake in the preheated oven at 170 degree C, for 20 minutes or until golden brown.
8. Take them out from oven and leave them to completely cool, remove from tart shell and store them away or add filling.

Chin's notes :
1. These can be made in advance and stored in an airtight container.
2. Do not knead the dough, just gently make the dough into a ball.
3. My pastry is quite thick on each tart shell, I yet to try thinner pastry with lesser dough.

Cream Cheese Fillings 

Ingredients:
250gm Cream Cheese
50g fine sugar
1 small egg
1 tsp vanilla extract or essence
Jam of choice, I used raspberry jam
Colourings for tart decoration

Preparation methods:
1. Put the cream cheese into the mixing bowl,  beat with the electric mixer until creamy.
2. Add in the sugar, egg and vanilla. Continue to beat until well combined. Transfer into a piping bag / plastic bag. If plastic bag is used snip off one of the corner.
3. Prepare colourings red for the flower petals and green for the leaves and set aside.
4. Place some jam onto the tart shell.
5. Pipe in cream cheese mixture onto the jam. I filled it up to the top to get the fuller tart.
6. Smooth with a toothpick.
7. Decorate your cream cheese, draw on the cheese filling with a toothpick.  Remember to clean your toothpick after each application.
8. Bake in a preheated oven at 170 degree C for 5 minutes or until cook.
9. After 5 minutes, touch the cheese fillings with your finger, if it comes out clean it is cooked.  If it stains your finger, leave them in the oven for an extra minute or 2 minutes. Watch them closely!!!
10. Take them out from the oven and leave them completely cool.  Keep them cool in the fridge before serving.

Have fun & Bon appétit

Chin's notes :
1. You can choose different jam flavour of your choice.
2. I get about 45 mini cheese tarts.
3. Try to make your tart shells in advance.