Thursday 30 July 2015

Golden Syrup

An important ingredient needed to make moon cake. This year I am going to try to make traditional moon cakes after I received my moulds!!!


Golden syrup cannot be used immediately it needs to be aged for at least 2 weeks.

I managed to prepare a batch just before I leave for my vacation & when I returned, it will be ready! :) 

Colours transition from initial to end. About 45 minutes process. 

Here is a simple recipe from Asian Delights - All Time Favourite Recipes by Betty Yew, one of my oldest recipe book ;) 

Ingredients: 
600g sugar 
1 & 3/4 cup of water 
Lemon juice from 1/2 of a large lemon 

Preparation steps:
1. Put all the ingredients in a pot & bring to boil. 
2. Switch the heat to med-low & slow bubbles until the mixture turned golden in colour. 
3. Turn off the heat & leave to cool. Transfer to a bottle for storage.
4. Set aside for at least 2 weeks before use. 

Voilà! 

Chin's notes: 
1. Don't forget to label the date on your bottle. 


Monday 27 July 2015

Light Butter Cake

I love butter cake & today there is a craving for butter cake & decided to try a new recipe with my 8"x8" pan.  A recipe from Rasa Malaysia.  It turned quite good, light & not too oily with buttery taste. Yum!


And I have always wanted to make lines prints on my cake top.  Finally there is a reason to try it.  It was really easy, lightly rub cold butter on the cooling rack, carefully, place the cake top resting on the cooling rack. Let it cool completely before flipping over. Place a plate at the cake bottom & flip it gently. Voilà! The lines were printed on my cake!! 

Bon appétit !! 

Here is the link to the recipe:

Chin's notes:
1. I used buttermilk instead of fresh milk / yoghurt. 
2. To make butter milk - 4tbsp of fresh milk + 1 tbsp of lemon juice, give a gentle stir & set aside for 10 minutes. 
3. For the lines print, need to rub butter on the cooling rack so the cake won't stick to the cooling rack. 

Saturday 25 July 2015

Prawn Otah-otah


Adapted the recipe from theMEATMENsg's recipe. I replaced all the fish meat with prawns. I prefer the prawn's version ... :p

Mixture of all the ingredients in the food processor.

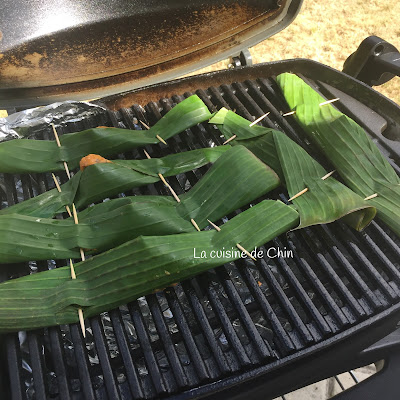
All wrapped up in banana leaves.


Chin's notes: 
1. Here is the link to original recipe
Video tutorial by theMEATMENsg
Recipe from jiaksimi.sg
2. My first attempt with tilapia fish & prawns. http://fromchinshome.blogspot.fr/2015/07/otah-otah.html?m=1


Quick Homemade Satay Sauce


This is an improved satay sauce which was very well received by my Singaporean guests. I made once in made in December 2014. I think I have finally got it to the taste that I wanted.

I did not made from scratch because I have a wonderful ready nasi lemak chilli from Singapore. Most of the ingredients for satay sauce is the same as the nasi lemak chilli, so it saves me some preparation time & I can quickly get my sauce ready before my guests arrives ;) 

Fried raw peanut, with skin removed.

Chopped red onions.

Cucumbers & red onions to dip into sauce

Here is a picture of the nasi lemak chilli that I used. 


Quick Homemade Satay Sauce. 
1 bottle of nasi lemak chilli 
3 red onions ( finely chopped ) 
400g of peanuts ( grounded coarsely )
500ml of coconut milk ( I used 2 pkt of ready coconut milk )
5 lemon grass ( bruised )
2 tbsp of sugar ( more if you like sweeter sauce ) 
2 tbsp of curry powder ( I used the curry powder for meat ) 
15g tamarind pulps mix with some water 
2 tbsp of cooking oil
Salt to taste ( I did not add salt ) 

Preparation steps: 
1. Heat up the oil in the pot & fry the onions until fragrant, add in the nasi lemak sambal, coconut milk, peanuts, sugar, lemon grass, curry powder & tamarind paste. 
2. Mix well, simmer about 30 minutes on medium heat. Simmer until the peanuts are soft but still a little crunchy. Stir the mixture frequently to prevent burning of the sauce at the bottom.
3. If sauce become too thick, add some water. 

Voilà! 

Chin's notes:
1. I like my satay sauce crunchy, hence I'll will lightly ground my peanuts with my food processor with lots of chunky peanuts. 
2. If you like the peanuts softer, cook a little longer. 


Thursday 23 July 2015

Cœur de Bœuf Tomate

Literally translated as "heart of the beef" . The American calls them beefsteaks tomato & they British calls them beef tomato. They are bigger than the usual tomatoes, with very little seeds & have a very firm texture. Ideal for salads. Pretty to look at too!! ;)  They are in season now!  

Made some salsa with it.. :D

I only new about this tomato from the cooking demo classes that I attended & also tried a few salads served from the restaurant in Paris! They are very yummy!!! 


Freezing Meat

I don't do my groceries every day, usually once every 3 to 4 weeks. I will divide my meat & freeze them. Used to take me a while to divide my minced meat into cooking portion. Saw this method from the internet sometime back, it's quite useful when you have lots of I don't do my groceries every day, usually once every 3 to 4 weeks. I will divide my meat & freeze them. Used to take me a while to divide my minced meat into cooking portion. Saw this method from the internet sometime back, it quite useful when you have lots of sorting to do with large quantity. Transfer into a clean bag, flatten & remove all the trapped air, divide & sub-divide & further sub-divide into the portion for each cooking. Lay them flat in the freezer. It also saves freezer space. ;) NB: In this picture, there is 1 Kg of minced meat. Bigger bag may be needed. to do with large quantity. 
Transfer into a clean bag, flatten & remove all the trapped air, divide & sub-divide & further sub-divide into the portion for each cooking. Lay them flat in the freezer. It also saves freezer space. As you can stack them neatly ;) 

NB: In this picture, there is 1 Kg of minced meat. Bigger bag may be needed.


Tuesday 21 July 2015

Otah-otah


Can't wait until we are back in Singapore to have these. Looked up YouTube for recipes & decided to try the recipe from video below.

Video tutorial by theMEATMENsg

Recipe from jiaksimi.sg


The ingredients in summary:
30g dried chili
30g lemongrass
4 kaffir leaves
250g shallots 
10 candlenuts 
1 tbsp turmeric powder 
25g galangal 
20g belacan / prawn paste
1 tbsp coriander powder
1 tbsp sugar 
1 tsp salt 
400g fish meat & 200g prawn meat 
2 eggs
100ml coconut milk 

They turned out very yummy & not enough to go around. ;)

Chin's notes:
1. I used tilapia fish meat instead of mackerel / batang. 
2. I used fish curry powder mix instead of turmeric powder. 
3. I will try with calamari / crab meat in the future. 
4. Added on 26/07/2015. Made some prawns otah-otah, by replacing the fish meat with prawns. ;p I prefer the prawn's version.


Wednesday 15 July 2015

Herbal Bak Kut Teh

Herbal Bak Kut Teh, a friend brought this packet when she was visiting. This my first time trying this brand. Very yummy indeed. 
Added - salt , cloves of garlics, taupok, Chinese dried mushrooms & spareribs. Simmer for 3 hours. 😋


Monday 13 July 2015

Homemade Kaya

I used to watch my grandma making kaya. She will first melt some sugar & add all the ingredients into the cooled melted sugar. The pot will sit in another pot filled with water over the hot charcoal.  This is to prevent the mixture from getting cook too quickly. Today, I used a heavy based pot over low heat.. ;)


Here is a video tutorial for making homemade Kaya. 
http://youtu.be/QvwZC7FoGAE

Here is a recipe from my 4th Aunt.
Homemade Kaya Recipe: 
Ingredients 
1 bowl of sugar 
1 bowl of eggs 
1 bowl of coconut milk 
A few pandan leaves - knotted
1 heavy based pot is preferred
Preparation steps: 
1. Melt one table spoon of sugar. Keep your eyes on it.. As they will turn brown very quickly. Do not burnt the sugar. This browning will give the kaya the nice brown colour. 
2. Once the sugar melted , immediately remove from heat. Swirl to coat the pot & set aside to cool.
3. Add in all the ingredients into the melted sugar. Mixed well & cook over low heat. Stir constantly until mixture thicken. 

Voilà ! 

Chin's notes: 
1. Spread them on bread, biscuits & kuih.
2. Use the same bowl to measure all the ingredients. 
3. If the heat is too hot, the mixture will become lumpy.


Friday 10 July 2015

Watercolour Painting

I have a little more time now because it is summer holidays for the kids. Just relaxing & practicing my brush's strokes.

Painted some tulips... 
Purple tulip from Keukenhof 

Tulip from my garden

Mussels with Chinese Cooking wine

Moule in French for mussels. They are smaller than the usual green ones. These are yummy just with some simple seasoning.


Here are the ingredients that I used 

Mussels with Chinese Cooking Wine
Ingredients 
1.4kg mussels - cleaned
1 big / 2 med size onions
5 cloves of garlic
A few stalks of coriander (cut thinly) 
Ginger ( same amount at the garlic or more) 
3 tbsp Chinese cooking wine ( I used shaoxing wine) 
50 ml / 1/4 cup of water 
Salt ( optional ) 
pepper & some sugar to taste.
1.5 tbsp cooking oil 

Preparation steps:
1. Thinly sliced the onions / cut into small cubes. Lightly crushed the garlics. And finely chopped the ginger. 
2. Heat up the oil in a pan/wok, add the onions, garlic & ginger when the oil is hot enough. Fry until fragrant. 
3. Add in the mussels & give a few good stir. Then add the cooking wine & the seasoning, water & coriander  . A few good stir then cover with a lid for 2 - 3 minutes. 
4. Once all the mussels opens, they are ready to be dished out for serving. Do not over cooked them as they will turn tough. 

Voilà & bon appétit !! 

Chin's notes: 
1. You can omit the salt, or just very little salt because the water from the mussels can be salty. 
2. Chili slices can be added if you prefer a little spicy. 
3. Scrub the mussels shells when you are cleaning them. Sometimes there are mud on the shells. 

Wednesday 8 July 2015

Simple Baked Chicken Wings


2 years ago we received a packet of home cooked chicken wings from my friend Tessa. Since then it has been our favourite dish. Yummy as a snack on it's own or as a dish with rice / noodles. 

Today, I tried to garnish each baked chicken wings with a pinch of sea salt. I like it with a salty touch! ;) 

These are easy to prepare & only requires 3 seasoning ingredients.

Simple Baked Chicken Wings 
Ingredients 
1 kg chicken wings - cleaned 
3 tbsp light soya sauce - I used Kikoman
Pepper to taste 
1 tsp sesame oil
Sea salt for garnishing ( optional ) 

Preparation Steps : 
1. In a big bowl, mix the chicken & the marinade well. 
2. Cover & set aside for at least 3 hours. Overnight is preferred.
3. Lay them neatly on a baking tray lined with aluminum foil / baking paper. 
4. Baked them in a preheated oven @ 180 degree C for 20 - 25 minutes until chicken is nicely browned & cooked. 
5. Transfer the chicken wings to a serving plate. 

Bon appétit ! 

Chin's notes:
1. I like to marinate my meat in a plastic bag & will turn/flip the bag occasionally to ensure all the meat are well marinated. 

Tuesday 7 July 2015

Vietnamese Rice Paper Rolls


My friend Angie, shared this easy to make rolls. I'm attracted to her dipping sauce. It is delicious & refreshing. Perfect for the hot summer that we are experiencing now. 

Ingredients at a glance 

I have prepared a video tutorial on how to prepare these rolls. 

Link to video tutorial : 

Have fun!! 

Chin's notes:
1. You can add your choice of ingredients to the rolls. Like bean sprouts / peanuts / crab meat & many more. 
2. A picture of the rice paper wrapper.


French beans Omelettes


French beans are in season now, they can be 6euro per kilo during certain time of the year. Now about 3euro per kilo. 

We love French beans, our regular dish, simple & easy to prepare.

French beans Omelettes : 
Ingredients
2 clove of Garlic - minced / chopped into small pieces
200g French beans cleaned & cut into small pieces. 
4 eggs lightly beaten
2 tbsp cooking oil 
Salt & light soya sauce to taste 

Preparation steps :
1. Heat up the oil in the wok / pan, add the garlic & fry until fragrant. 
2. Add the French bean & fry a little while & add some salt to taste. Fry until lightly cooked. 
3. Spread the French beans evenly. Pour in the eggs to coat the French beans. 
4. Wait for a few minutes, when the bottom has a nice browning. Flip the bottom & cook the top until you get a nice browning on both sides. 
5. Dish out, drizzle some light soya sauce in the omelettes & garnish with coriander & red onions. 

Bon appétit !! 
1. You can add the light soya sauce to the eggs before spreading on the French beans but I prefer the taste of omelettes with the light soya sauce. ;) 

Wooden Trays with Paper Napkins


Summer holiday started, I have a little more time to explore crafty ideas that I saw at Cultura (a craft shops in Paris).

What you'll need.

Steps: 
1. Sand the wooden tray with a sandpaper to smooth the rough surface & edges. I can't find my sandpaper, hence I did not manage to sand the rough edges & surfaces. 
2. Apply the acrylic paints of choice on the wooden  tray. At least 2 coats of paint is required. Ensure the paint is completely dry before you apply another coat of paint.
3. Cut out the required motif / shape from the paper napkin. Lay on the wooden tray while the paint is still wet. Use a brush to smooth it out. Needs some practice. I'm not quite there yet.. ;) 
4. Finally when the paint is completely dry. Apply a few layers of varnish. 

Voilà! 

Monday 6 July 2015

French Beans with Prawns

We love French beans. I normally fried them with dried shrimps, ginger, garlic, oyster sauce & shaoXing cooking wine. Add a little sugar. Today decided to add some prawns.


Preparation steps:
1. Fry garlic & ginger with some oil in the wok until fragrant. 
2. Add in the dried shrimps & fry until fragrant. Add in French beans & prawns. 
3. Give a few good stir, add in some cooking wine & a few good stir then cover with a lit for a few minutes. 
4. Season with oyster sauce & some sugar to taste. 
5. Dish out & serve with steamed cooked rice. 

Bon appétit !! 

Chin's notes: 
1. Here is another way to prepare the the French beans. 
http://fromchinshome.blogspot.com/2015/01/fried-french-beans.html
2. They taste as good without the prawns.