Saturday, 16 May 2015

Steamed Orange - a cough remedy?

The whole family had been sick since we came back from our short holiday trip to the Netherlands.  We get persistent night coughs.

Someone from the cooking forum shared a natural remedy & I decided to look up if there is a recipe / any information on Steamed Orange. 

Slice of the top & add 1/2 tsp of sea salt.
Steamed for 15 mins & leave to cool in the steamer.
Drink up, eat up & leave the skin.

Here is what I'd found : 

I bought some organic oranges & sea salt to try.  After taking the steamed oranges for 2 evenings. 
1. On the 1st night, coughs reduced. The 2nd night, it completely stopped or at least my sleep was not disturbed & I'm not aware if I did cough. 
2. Our day cough reduced as well. 

Chin's notes: 
1. I used 1/2 tsp of salt per orange. A bit salty for my kids but they still finished up the whole orange. 
2. Drink the accumulated water in the bowl. 
3. Will prepare these for the next few days. 
4. Please use organic oranges if possible, otherwise best to remove the wax on the orange skin before you streamed them. As you will be drinking the water accumulated in your bowl.
5. If you see a hole at the bottom of the orange.. It is not required to sliced the bottom., I was trying to level my orange & it was too big to close my lid.. 😁 

Pandan Chiffon - Cooked Dough Method

I have always baked my chiffon using the "usual" method.  Jenny Lim shared an interesting recipe & I just have to give it a try.  The texture is much softer compared to the usual method's chiffon. This recipe is a keeper. :)


The recipe asked for pandan juice , I used pandan extract & replaced the water with more coconut milk. I used plain flour instead of cake flour.

Oh.. This recipe do not ask for cream of tartar & baking powder. ;)

The processes happened very fast, I did not have enough time to preheat my oven. My batter was waiting (at least 3 mins) for my oven to be ready. 
NB: Make sure you start your oven before you prepare the batter. 


Pandan Chiffon adapted from Wen's Delight

Ingredients: 
5 egg whites 
80g sugar

5 egg yolks 
100g coconut milk 
1 tbsp pandan extract 
50g butter
90g plain flour 

Preparation steps: 
1. Whisk ingredients A until stiff peak. 
2. In a pot (heavy based is preferred), put in the coconut milk, butter & pandan extract. Over the stove, heat up the pot until the butter melted, turn off the heat. 
3. Fold in the flour quickly, until well mixed. Then add in the egg yolks & mix well. 
4. Gently fold 1/3 of the egg white into warm batter (B). Then the mixed mixture into the remaining egg white. Fold evenly until well mixed. 
5. Transfer batter into the chiffon baking pan. Drop the baking pan gently on the table to release trapped air. About 3 times. 
6. Bake in a preheated oven at 170 degree C for 10 mins then continue to bake at 150 degree C for 35 mins. 
7. Test the cake if fully cooked with a toothpick / cake tester.
8. Invert baked cake immediately for cooling. 
9. Use a kitchen knife to unmould the cake when cake is completely cooled.

After baked.

Invert to let the cake cool.


Chin's notes: 
1. Here is the original recipe shared. 
2. Remember to start preheating your oven before you start preparing your batter. The steps by steps process is so fast. 
3. Do no grease the cake pan, the batter needs the "wall" to "climb". 
4. There is no cream of tartar & baking powder used in this recipe. 

Yummy Moist Butter Cupcake


Janice shared the following recipe. There is a method that was used in the preparation. I did tried the method, they really turns out moist. But I am lazy to do the whites & yolk separately, hence I combined & used the ingredients measurements. The cupcake is really moist even after days! 


Added chocolate chips


Butter Cupcakes adapted from 

The Famous Mrs NgSK's Super Moist Butter Cake


Ingredients : 
230g soft butter at room temperature 
4 eggs - about 200g or there about
200g plain flour 
200g sugar 
60ml fresh milk 
1 tsp vanilla essence / extract
1 tsp baking powder

Preparation steps:
1. Cream butter until creamy then add the sugar. Cream until light & fluffy. 
2. Add egg one at a time, then milk & vanilla extract. Beat until well combine. 
3. Turn the electric mixer to slow, slowly fold in the flour. Stop the machine until all well combine.
4. Put paper liners on muffin moulds, then fill it up 2/3 with the cake mixture. 
5. Bake in a preheated oven at 150 degree C for 30 - 35mins or until the cupcakes are fully cooked. Toothpick test, if it comes out clean, the cake is ready. 
6. Take them out from the oven & leave to completely cool before dressing up the cakes. 

VoilĂ  !! 

Butter Cream Icing 
125g soft butter at room temperature 
125g icing sugar
1 tsp vanilla essence / extract 
Colouring ( optional ) 

Preparation steps:
1. Whisk butter until it turns pale / light.
2. Slowly add in the icing sugar & vanilla extract. Whisk until light & fluffy. Add choice of colouring & whisk until well combine. 
3. Transfer to piping bags with attached nozzle & pipe on to the cupcakes. 

VoilĂ  ! 

Chin's notes: 
1. The link to the original recipe : 
2. You can also add chocolate chips into the mixture.
3. The mixture yield about 16 - 18 cupcakes. 

Thursday, 14 May 2015

Silky Steamed Eggs


It took me a while to get this right (almost 1 year) & finally  I think I managed to achieve the texture & the softness. 

There are 2 important factors 
1. The eggs & water ratio is 1:2 
If 4 eggs measured to 1 cup then 2 cups of water is needed. Mix well. 
2. The heat control. 
Let the steaming water boiled then add the eggs. Turn to medium-low & let it steam for 15 minutes. This will minimise the bubbles forming in the eggs. 

Added 19 May 2015 
NB: cover the egg mixture with cling wrap / plate / lid to prevent additional water getting into the egg mixture during steaming. 

VoilĂ ! 

Garnish with sesame oil, light soya sauce, fried garlic / fried onions & coriander / spring onions. 


Chin's notes: 
1. Sieved the eggs mixture to remove any impurity & bubbles. 
2. I used an electric steamer / rice cooker.
3. If I used the rice cooker , I will put in the eggs mixture after 10 minutes in cooking mode. 
4. You can add some salt / chicken stock to the eggs before streaming. But I prefer to add light soya sauce & sesame oil to my steamed eggs. :P

Saturday, 9 May 2015

Happy Mother's Day 2015

This year Mother's Day, we celebrated in Keukenhof, Netherlands... A beautiful spring garden (32 hectares) with 7 million flower bulbs & 800 varieties of tulips.

Wishing all mothers many blessed days a head...


Monday, 4 May 2015

Pandan Kaya Cake

I have a mission to make this cake for a special celebration in Paris.  I have never baked this cake before & I'm determine to give it try with the following recipe from Kitchen Tigress. 


My first attempt & I made some minor adjustment to the recipe because I do not have some of the ingredients & they turned out great! At least they taste yummy to the family ( my tasters ;) !! & the sweetness is just right! :p

This is a cake with a layer of "jelly" / custard garnishing with coconut flavour.

Pandan Kaya Cake adapted from Kitchen Tigress

For the cake recipe : 
Ingredients - 
4 egg whites ( from medium size eggs) 
40g sugar 
1/2 tsp cream of tartar 
B
10g sugar 
3 egg yolks ( from medium size eggs ) 
50g corn oil / vegetable oil
45g coconut milk
1/2 tsp baking powder 
50g plain flour - sifted 
1 tbsp pandan extract

Preparation steps:
1. Line the baking tray with baking paper. 
2. Put all the A ingredients into the mixing bowl & whisk until the egg whites stif peak. 
3. In a separate bowl, mix all the B ingredients until they are well combined. 
4. Gently fold A into B in 3 portions until they are well combined. Do not over fold.
5. Transfer mixture into a lined baking tray & bake in a preheated oven at 160 degree C for 40 minutes or until the cake is cooked. Test with toothpick, they should come out clean when cake is cooked. Meanwhile, prepare the kaya / jam while waiting for the cake. 
6. When the cake is ready, remove from oven & leave the cake to cool on a cooling rack. 

For the kaya ( jam ) recipe
Ingredients -
C
340g of water + 1 tsp pandan extract
1/2 tsp of white agar agar powder
40g sugar 
25g of butter (I used salted butter) 
A pinch of salt (very little to bring the flavour out)
D
120g coconut milk
35g corn flour 
1/2 tsp pandan extract 
Few drops of yellow colouring ( or more to get the desire green colour) 

Kaya / Jam 

Preparation steps : 
1. While the cake is in the oven baking. Mix all the C ingredients into a cooking pot (thick/heavy base pot is preferred). Stir until all the sugar dissolved. Set aside for 30 mins / more. 
2. In a separate bowl, mix all the D ingredients until they are well combined. 
3. Only start to cook the kaya / jam only when the cake is competely cooled! 
4. Heat up the pot with C mixture on a medium heat. Do not bring to boil. Just warm enough to melt the butter.  Once the butter has melted. Turn off the heat & remove from heat. 
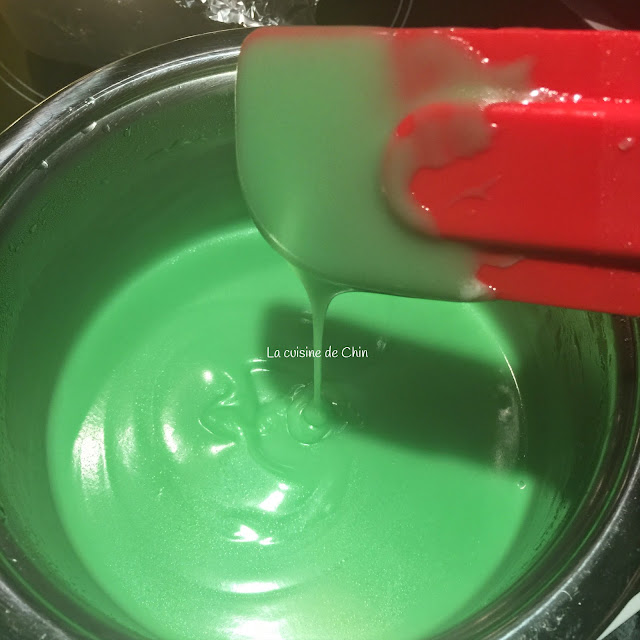
5. Stir in D mixture into C, once is well combined, turn on the heat to low - medium heat & cook the mixture until it is smooth & thicken. Stir constantly. Add more drops of yellow colouring if the mixture is too green. Add yellow colouring until the desire colour is achieved. 
6. Once mixture is thicken (when they coat the side of the pot). Turn off the heat & set aside to cool down a little. Just a few minutes.

To assemble the cake: 
Cake assemble process
1. You'll need a container / pan to put  the cake & kaya together. I lined the container/pan with aluminum foil. 
2. Cut the cake into the desire shape. I just halved my square cake to get 2 rectangle cakes. 
3. Place the bottom layer cake in the prepared container / pan. Then pour the kaya over the cake. Slowly swirl to get a layer of kaya coated evenly on the cake. 
4. Then wait for the kaya to set a little. I put into the fridge for 1 min to let the kaya set. 
5. Place the other half of the cake on the kaya. With the top facing the kaya, so I will get an even top for the finished cake. Then pour the kaya over the cake, swirl to get a smooth & even top.
6. Leave it in the fridge until the kaya is completely set. I left it overnight in the fridge. 
7. When the kaya is set, unmould & trim off the edges. Cut the cake into serving bite sizes & serve them cold. 

Trim off the sides

VoilĂ  & bon appĂ©tit! 

Chin's notes
1. Here is the link to the original recipe: 
http://kitchentigress.blogspot.sg/2014/06/pandan-kaya-cake-video-recipe.html?m=1
2. The ingredients were quite small, I'll double them in my next bake! Only managed to get 2 layers of cake instead of 3. My final cake is about 5.5"x8.5" cake.
3. Take note of the sequence in the preparation. 
4. Kaya consistency can be tricky. I cooked until I can see the obvious stirring trails when I stir the mixture. 

Sunday, 3 May 2015

South Taiwan Braised Pork


I love to eat pork especially braised pork. Saw Rontree Chan shared the following link in a cooking forum. And I just have to try it & the verdict ! Yummy is the word!

I have never tried this dish.  The meat & peanuts are just the right texture. The gravy is superb!

I had them with cooked steamed rice & perfect with pickled cucumber. 

The best part is , there is no additional cooking oil added. I guess it is slightly healthier ;)

The ingredients are easily available too. 
Ingredients at a glance

South Taiwan Braised Pork Belly 

Video of the shared recipe: 

Below is my interpretation of the recipe: 
Ingredients
Pork belly, sliced & cut into stripes
5 star anise , I used 8, cos I thought I heard 8. 
Raw ground Peanuts - as much as you like. 
Fried shallots
Fried garlic
5 spice powder
Salt, pepper & sugar to taste 
Light soya sauce 
Water 

Preparation steps: 
1. Fry the pork belly on the pan without oil until they turned white. Do not brown them. 
2. Then add the light soya sauce, add enough to get the nice browning color. Give a good stir. Add in all the remaining ingredients & stir well. 
3. Add water, just enough to cover the mixture, bring to boil & let it simmer for 50mins with the lid on. 
4. Served with cooked steamed rice or as suggested in the video cooked glutinous rice. 

Bon appĂ©tit ! 

Chin's notes: 
1.  I added some dark soya sauce to get the darker brown. 
2. I like them a little sweet & salty (adjust to your taste). I like to use rock sugar in my cooking. 
3. I used 8 star anise instead of 5 cos I heard wrong, I was worried about the dish may turned out too strong. But it turned out perfect!! 
4. Here is the recipe to the pickled cucumbers: 
5. Thank you Jacqueline Wee, for sharing the following website to give the measurement of ingredients used: 
Here is the translation in English :-
400g Pork belly, sliced & cut into stripes 
5 pieces star anise 
Raw ground Peanuts 100g
Fried shallots 2 tbs æČč蔄酄2ć€§ćŒ™
Fried garlic 2 tbs、蒜酄2ć€§ćŒ™
5 spice powder 1 tsp
Light soya sauce 3 tbs
Rock sugar 1 tbs
Pepper 1 tsp
Salt 1 tsp